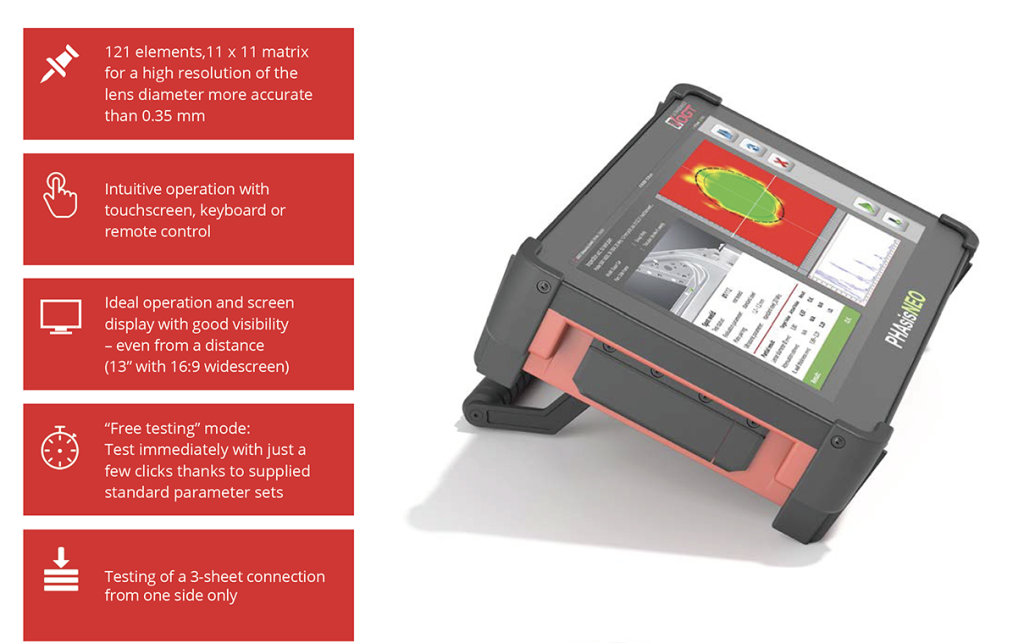
System highlights
Precise testing of resistance-welded spots of steel or aluminum sheets
The minimal training time of approx 4 hrs.
2- and 3-sheet joints with single sheet thickness from 0.6 mm to 5 mm
Extremely high image sequence and inspection speed due to 20,000 ultrasonic measurements per second for high-resolution spot weld inspection
More than 700 measuring points (A-scans) were recorded in the inspection area per spot weld
Storage of all A-scans for possible re-evaluation and correlation to destructive testing
Imaging display of the spot weld as live scan(C-scan) and as a result (D-scan, depth accurate)
A universal standard probe; special solutions available (e.g., for coarse-grain structure/ aluminum / hard-to-reach areas)
All-in-one device: management of inspection plans, monitoring of inspection equipment, secure inspection according to inspection plan, or flexible with one-click presets or individual parameters in„free inspection“ mode
Support of high probe frequencies up to 25 MHz for reliable spot weld inspection

When using multiple PHAsisNEO inspection systems, the PHAsisMANAGER administration software can be installed on an independent PC to organize and synchronize all information with the PHAsisNEO ultrasonics devices:
Single user or central management of test equipment, plans, and results
Management of access rights
Monitoring of inspection equipment, including scheduling for calibrations
Data import of test plans (CSV files)
Data export of test results (modern REST interface)
Secured test sequence up to 100% fulfillment through preset test plans
Wireless test plan and data synchronization via WLAN between the device and the server
If required, PHAsisNEO can communicate with the customer‘s existing database system via a standardized interface.
The inspection time with PHAsis inspection and evaluation software is just a few seconds per spot. The evaluation provides data on the diameter of the welded spot, the remaining wall thickness of the welded area as well as the sound attenuation caused by structural transformation as possible evaluation criteria for zinc adhesion bonding.
Mode “Inspection according to test plan”
In this mode, the inspection plans are created by an experienced ultrasonic inspector and made available to the users by means of synchronization with the individual inspection devices.
As a result, the users no longer have to make any test settings. They only inspect the spot welds using the visually displayed test plan and the automated proposed evaluation. This means even test personnel without in-depth knowledge of ultrasonics is easily able to perform reliable testing.
Mode “Free testing”
The mode “Free testing“ enables a fast inspection of various spot welds, without the use of test plans.
Access to the full functionality of inspection and evaluation, as known from the mode “Inspection according to test plan, “ is still possible. After the inspection, the results of the free testing can be transferred into an inspection plan as well as into a standard inspection.
Call us for a demo or more info at 248-299-0525.